 Written by Tommy Gun
Note: Japanese title: “The Zombie vs. Kyuukyuusha.” Click on any large thumbnail for the full-size image.
Perhaps the greatest name of anything ever. Even better than the name “Snakes on a Plane,” or at least as good. Besides having a great name, the concept seemed fun enough. Try to guess what it’s about!
Zombies roam the streets, and it’s up to you, a young doctor, to kill them with your tricked out ambulance of death! Rescue survivors! Kill zombies! Upgrade your ambulance with bigger blades! Kill more zombies! Do it again from different angles! Again and again, and again and again and again!

 This is a Simple 2000 Series game, vol. 95 for PS2, by D3 Publisher. Yes, that means there have been 94 previous games, and more after. They’re budget titles, retailing for about $20. Remember, these are import titles, so you’ll need a Japanese PS2 or Swap Magic to play them!
You can get this game from Play-Asia. Thanks to 62t for mentioning that a PAL version is coming, titled “Zombie Virus” (name change FTL).
Most of the games are said to be pretty bad. This one isn’t exactly an exception, as they’re all pretty simple concepts with lots of filler. It was genuinely fun for a couple hours, but then you reach a point where you just have to keep killing zombies so you can upgrade, and it becomes more of a chore. In any case, I figured there might be some people out there who want to give it a shot, so I made this guide. This is a work in progress, and may never be fully completed. It should give you enough information to play the game, but I can’t read Japanese so this is just stuff I’ve figured out. If anyone wants to help, let me know!
Since this game is Japanese, CIRCLE is used to select things, and X to back out/cancel.
You can see some videos of the game on YouTube.
Contents:
- Start Up
- Hospital / Garage (important people)
- Ambulances / Vehicles
- Ambulance Upgrades
- Driving Controls
- HUD while driving
- Gameplay
- Basic Tips
- Power-ups
- Bosses (spoilers)
Start Up:
You really shouldn’t need help here, especially since it’s in English. Choose “Continue” if you want to load a saved game. According to the manual there’s something called “Attack,” but I haven’t unlocked that yet.
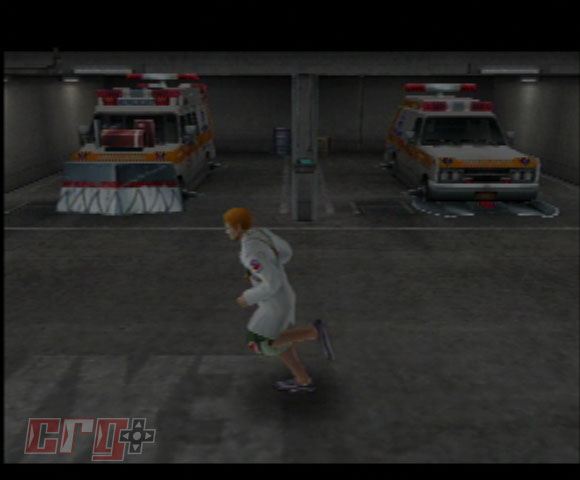
Hospital / Garage
Hold X to run. There will be various people in the garage (after you saved them). Go talk to them by hitting circle while standing in front of them. To exit their menus hit X. Here are the important people:
Woman #1, SYSTEM:
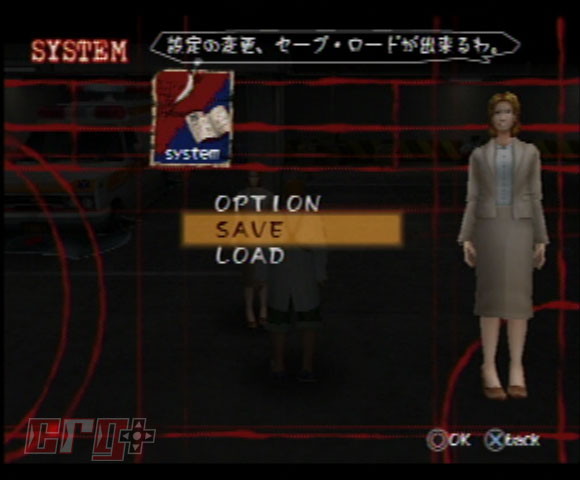 Just to the right of the first ambulance, tan office clothes. She lets you save the game, load, change options. There are three save slots, if you save over an existing game it will ask “Are you sure you want to overwrite?” — select yes or no.
Engineer, DEVELOP:
 Back right corner, blue outfit. (He’s actually called a Mechanic in the game, but I wanted to separate him from the CUSTOM guy.) He will “build” stuff for you. The ones that have stars next to them are the ones you already have. If an item is white you can put in an order for it by selecting it. Only one can be ordered at a time, so choose the one you want the most.
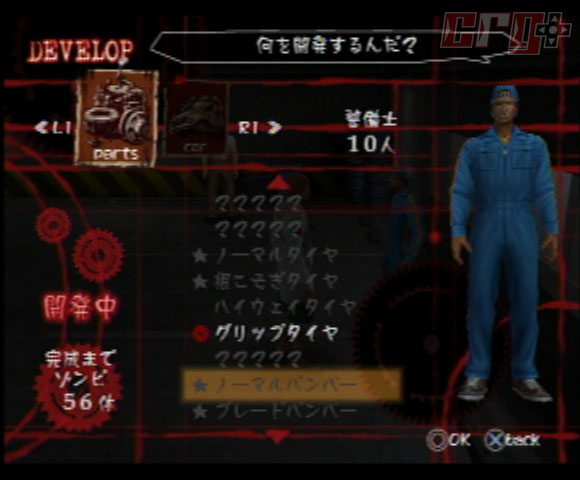 After you order one, everything will be grayed out and the one you ordered will have a red circle next to it. If you select it again you can cancel the order.
He tells you the number of zombies you must kill for it to be finished (uhhhhh? The upgrades are made of people! PEOPLE!!). That number is shown at the bottom left inside the gear, and is updated each time you come back. When you’re out driving there are two gears at the left side of the screen with some text over them. If you hit the required amount, it will say “completed!” and disappear.
The upgrades are broken up into groups. There’s no clear divider, but it will be obvious when you first start since only one thing is unlocked in each. There are five in each group, so you can just count them. In order:
- Engine
- Tires
- Bumper
- Lights
Read the Ambulance Upgrades section to see what they do.
R1 shows the new vehicles, they need to be unlocked first by saving engineers. The upper right corner displays the number you have saved. See the Ambulances section for more info.
Mechanic, CUSTOM:
 Back right corner, tan overalls, hat. He lets you customize your ambulances by equipping your items. Select which ambulance you want from the list (hit circle three times). Here it is broken up into the same categories as above, hit L1/R1 to scroll back and forth. Only the finished orders are shown (in white), the rest will be shown as “?????”. Equip the ones you want (currently equipped are red with stars). You have to equip the ambulances independently of one another, but you only have to buy something once, and you can equip it on all ambulances. See the Engineer section for more info.
Woman #2, ADVICE:
 This woman is on the right. She tells you info on controls, etc., but it’s in Japanese of course.
Woman #3, STATUS:
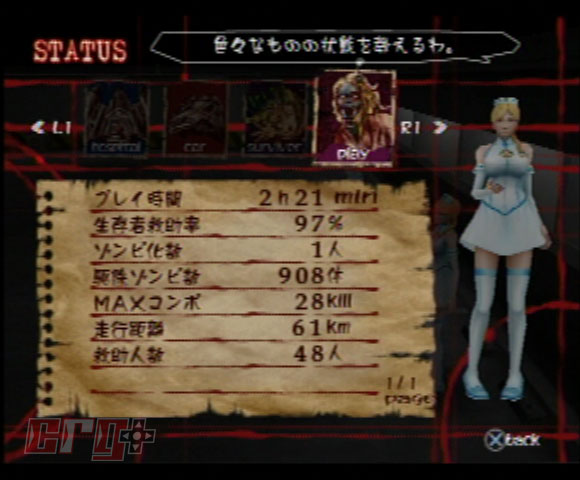 This woman is to the left of #2 (her left), and shows your stats. How many minutes playing, number of kills, etc.
Ambulances / Vehicles:
 To go out driving, walk up to an ambulance and hit circle. It will ask if you want to go out, select yes.
You must unlock the other vehicles, there are a total of five. The bigger ambulances hold more people. Definitely buy them as soon as you can. You unlock a new vehicle when you rescue a certain number of engineers:
- Small: Default, holds two.
- Medium: ??, ??, holds three.
- Large: 15 engineers to unlock, 300 kills to buy, holds four.
- Police Car: 30 engineers to unlock, 480 kills to buy, holds three. Small and fast, with a GREAT turning radius. Despite only holding three, its control and speed makes up for it, you’ll want to use it.
- ?: 45? 50?, ??
Ambulance Upgrades:
These are the upgrades you can buy:
- Engine: Increases speed. Also increases boost?
- Tires: Increases speed and attack.
- Bumper: Increases attack and defense.
- Lights: Increases your search distance.
It’s a bit more complicated than that, though. The items may change other things, like getting a new bumper may be lighter than your old one, and thus makes you faster. Or new tires have spikes, so they increase attack, but they’re heavier and slower. You can see which stats it changes, but it’s in Japanese so I’m not sure which is which.
Details below:
Engines:
- Default.
- Green/Yellow Rocket Engine. Has 2 turbos available.
- Red Engine.
- Blue Engine.
- White/Red Rocket Engine. Has 3 turbos available.
Tires:
- Default.
- Single Spikes.
- Yellow hubcaps.
- Green hubcaps.
- Spikes with blades!
Bumpers:
- Default.
- Axe Blade! Equip this early if you need to kill a lot of zombies.
- Plow, with painted teeth.
- Glowing green blade. Seems faster, but not as effective at killing.
- Golden Blades.
Lights:
- Default.
- Raised up. Increases distance?
- Flat box.
- Solid Red. Shows zombies as red dots on radar!
- UFO type thing, green center, four red lights. Shows zombies as red dots, and also shows power-ups as green dots!
Recommendations: Get the Axe Blade bumper as soon as you can, don’t bother with the others. The UFO light is really useful, but obviously you won’t get it for a while. Get engines soon as well, you’ll want the speed. New vehicles should always be your first priority though.
Driving Controls:
- X: Gas
- Square or Circle: Brake
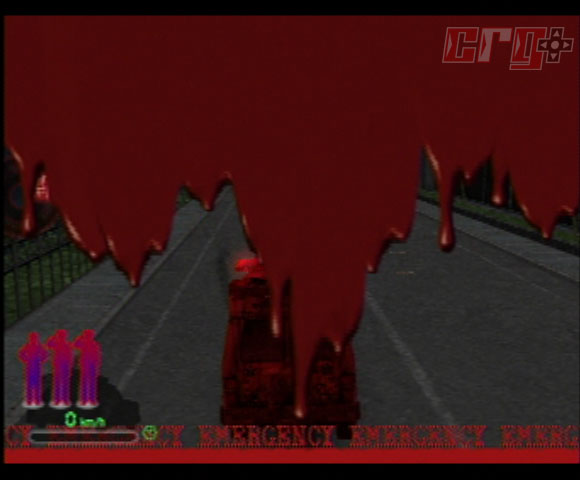
- Triangle: Speed boost. Can only be used once per outing. (Side note: check out those graphics when boosting! Who needs motion blur when you can put…lines on the screen…)
- L2: Turn flashing lights off (I don’t know why you’d do this)
- R2: Turn flashing lights on
- Left analog: Steer. If a zombie is on your roof, shake back and forth to knock him/her off.
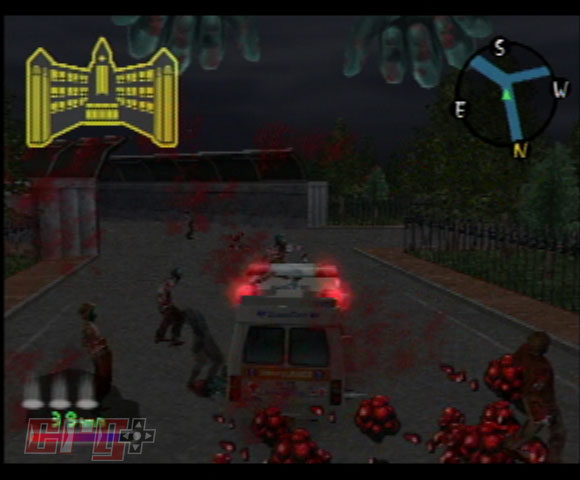
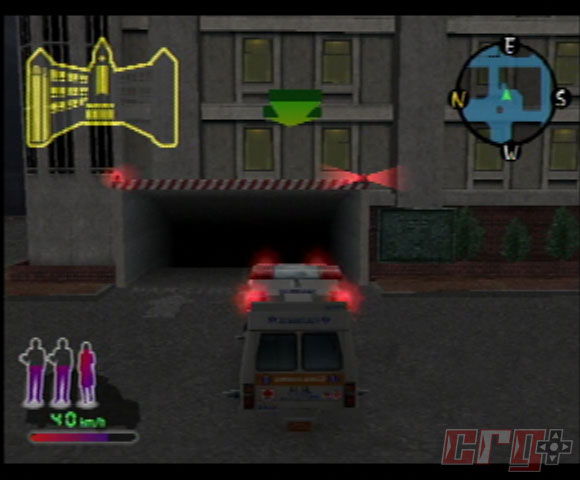
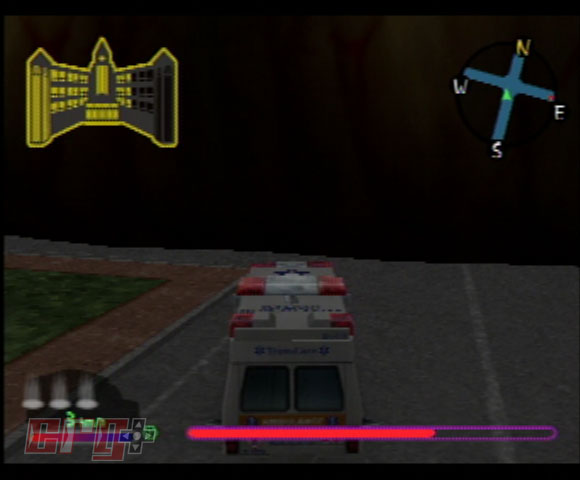
HUD while driving:
 Hospital gauge, top left. This is how long the hospital can fend off the zombies without you. Basically a time limit. If it runs out, you’re dead. Rescue military or police survivors to raise this gauge back up. Also, getting kill-combos raises it back up a little bit. The timer does NOT reset when you return to the garage. If you die, continue and the timer will be back up to about half full.
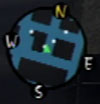 Mini map/radar, top right. White dots are people you can pick up.
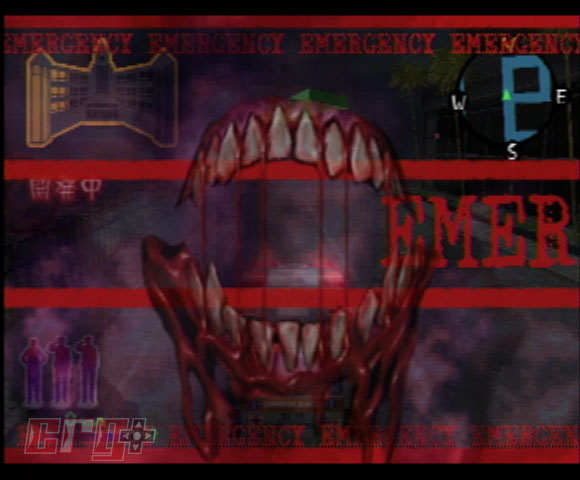
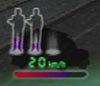 Ambulance silhouette, bottom left. It has little “spotlights” on it indicating how many survivors you can pick up. After you pick someone up they will be shown there as an outline. They will slowly start turning into a zombie, and their icon will fill up. Once it’s full, the screen will say “EMERGENCY” and the zombie will begin attacking you. Your health will go down very fast, and if you don’t make it back to the hospital (or pick up a medicine power-up), you will die.
The colored bar below the ambulance is your health. Pick up a power-up, or simply return to the hospital to refill. Your top speed decreases as your health decreases. To the right of your health is your turbo, a green “T” with a circle around it, if available.
Gameplay:
Here is the basic gameplay while out driving:
Kill Zombies!
Hit them! You need to kill a lot of them to upgrade and unlock stuff.
There is a combo system for killing zombies. The right side will tell you how many zombies you’ve killed, and if you’re fast enough it will keep going up. If you wait a few seconds without killing a zombie, it will reset to zero. Try to hit the single zombies in between the groups to keep the multiplier going. When you reach certain combos it will display a logo:
5: Good!
10: Great!
20: Excellent!
50: Fantastic!!
Aside from the logo, you will also gain “hospital health,” enabling you to stay out longer.
Occasionally a zombie will jump on your roof (and/or the side). You will see it, as well as hands coming down from the top (and/or the side) of the screen. Shake the left analog to knock him/her off.
Pick up survivors:
 Crazy Taxi style. Find the survivors on your radar, or look for the green rings. Slow down and stop inside the rings and wait for them to get in.
 Follow the green arrow back to the hospital to drop off the survivors. Remember that the door is on the West side, so you must face East to enter (this is important to remember when you’re running out of time).
Basic Tips:
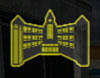
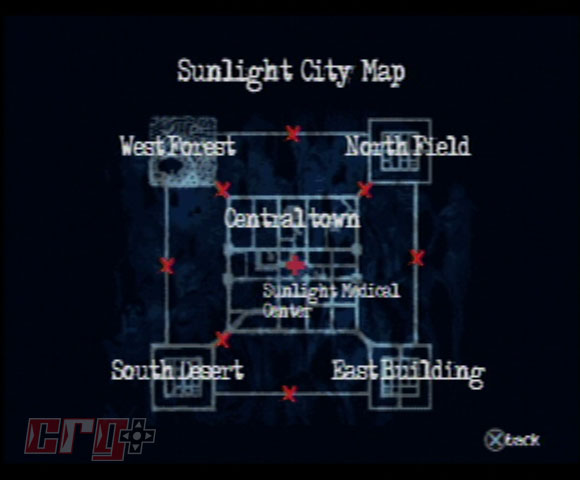 You can pause the game and look at the map, although it doesn’t show anything in real time (your current location, etc.). It does show which parts are unlocked, however. There will be red X’s where the roads are blocked off. Notice that each location is actually 45 degrees clockwise (e.g. East Building is actually lower right corner, Southeast). To unlock a new area of the city, you must rescue three politicians. The politicians have white hair, and maroon suits. Once a new area is open, the old one is closed, and you must fight a boss. The politicians will disappear from the garage.
Don’t drive too fast straight at a survivor or they will jump out of the way.
Once you get farther in the game and unlock the farther locations, you’ll have to be careful not to let your rescued people turn into zombies. Before you pick anyone up, look for health packs and remember the locations (they’re random each time you go out). Then after you’ve picked up everyone you can, get the health before heading back.
Power-ups:
You will see some power-up icons in random locations.
 Syringe: Cures passengers.
 Health Bag: This is actually an IV bag, hard to see though. It gives the ambulance and passengers health.
Toolbox: (not shown) Gives the ambulance health.
Bosses (spoilers):
You must fight a boss as soon as a new area of the city is opened. Boss strategies below.
– SPOILERS –
– SPOILERS –
– SPOILERS –
– SPOILERS –
– SPOILERS –
First Boss — Worm:
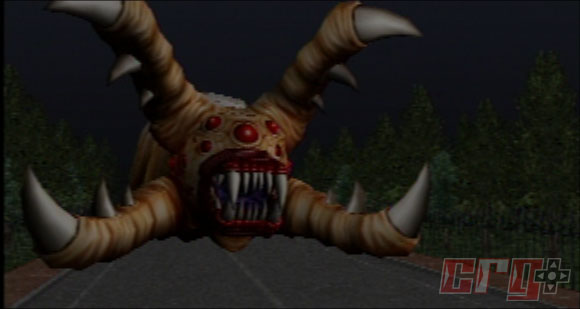
 He is shown on your radar as a red dot. Stay to the side, don’t drive at him. Slowly drive towards the middle and back up as soon as he starts moving. He will slither right past you, exposing his side. Ram into it. Repeatedly. (Hold X.) Repeat the whole process until he’s dead, it shouldn’t take long. You will instantly be back at the hospital. Possibly the easiest boss in the history of gaming.
Second Boss — Military Zombie:
You are stuck in an alley. The zombie will jump up on the walls. He has three attacks, firing his machine gun down, dropping three grenades, and shooting a rocket straight down. He’s an easy boss, but very boring. He will never climb all the way to the end, so simply stay back while he’s firing, and wait until he (eventually) jumps to the ground. Ram into him. Repeatedly. (See a pattern with the bosses?) As soon as he jumps away back up, otherwise you will get shot, and his attacks are actually quite powerful. If you get hit too much, you might want to just restart, because you will be extremely slow and it will take forever.
Third Boss — Desert Worm:
You’ll have to drive to the South Desert for this one. This time the worm comes up out of the ground. It will throw rocks at you or swing its head back and forth. It appears in the corners of the field, and sometimes in the middle. When it is out of the ground, ram into its body. It shouldn’t take very long.
Fourth Boss — Snow Moth:
Located in the North Field, this moth flies around, occasionally landing on the raised platforms. It will attack by:
- Sending out a shockwave below it, sometimes with an “electric tornado” spinning towards you.
- Throwing fire everywhere.
- Shooting laserbeams out of its mouth.
- Swooping down at you.
Wait for it to land, then ram it. When it gets down to just a sliver of health left, it will fly away.
[…] This is a budget Japanese PS2 game that was universally panned at E3 for not living up to its Snakes on a Plane-esque ridiculous moniker. More info on it can be found here, but it really doesn’t look like much besides a sort of murky Crazy Taxi knockoff where you plow over the undead, rather than drive them to Taco Bell. Still, it’s zombie week, so here’s some footage of the zombie’s eternal struggle against EMT personnel. […]
[…] – I simply can’t wait to get my PS2 modded so I can play Zombie vs. Ambulance. Though one major headache whenever playing import games is with the language barrier, which I was afraid my hinder my experience with ZvA (among other titles), but I need not worry anymore, thanks to this recently published FAQ. […]
[…] The gaming blog Cracked Rabbit Gaming has a nice FAQ of a Japanese PS2 import title that looks to have all the fun and campyness of Dead Rising except under the hood of an ambulance. The title, called The Zombie vs. Kyuukyuusha or The Zombie vs. Ambulance, is apparently in its 95th iteration and has been a budget title for the very lucky Japanese audiences. […]
[…] The Zombie vs. Ambulance Gracias a Harmony House, este puede ser el mejor titulo para un videojuego y un formato de juego muy simple. Tu ambulancia, ellos zombies! Enjoy […]